WhatsDesk Application
App Settings
- General Settings
- Supervisor Configuration
- Websocket/Pusher
- Whatsapp Settings
- Ticket Settings
- Email Settings
- Custom CSS & JS
- Captcha Settings
- Payment Gateways
- Security Settings
- IP List
1. General Settings
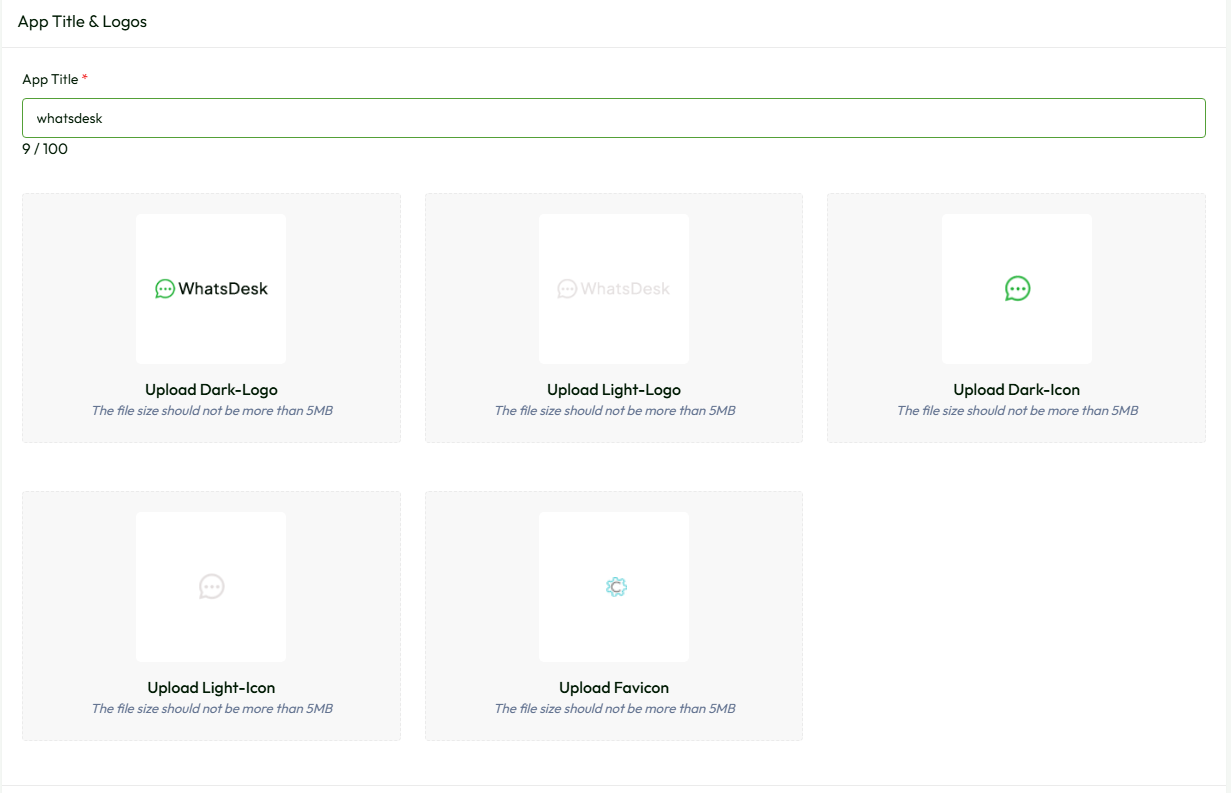
How to Setup “App Title and Logos”?
- Title : It’s the main title for the application. You can set the application's main title here by filling in the below input field with the "Title" name.
- Upload Light-Logo : You can upload your own branded "light logo" to be displayed at the top of the vertical side menu bar. This customization allows your application's interface to reflect your brand identity.
- Upload Dark-Logo : You can upload your branded "dark logo" to be displayed on the login form of the application, ensuring your brand identity is reflected during the login process.
- Upload Dark-Icon : You can upload your branded "dark icon" to be displayed in the mobile view of the application, ensuring the icon is visible when the window size is minimized to mobile dimensions.
- Upload Light-Icon : You can upload your branded "light icon" to be displayed when the side menu bar is collapsed or closed, ensuring consistent brand visibility.
- Upload Favicon : You can upload your branded "favicon" to be displayed in the browser tab, ensuring consistent branding in the application’s title area.
Note :Please click on the “Save Changes” button after uploading the title, logos, icons, and favicon.
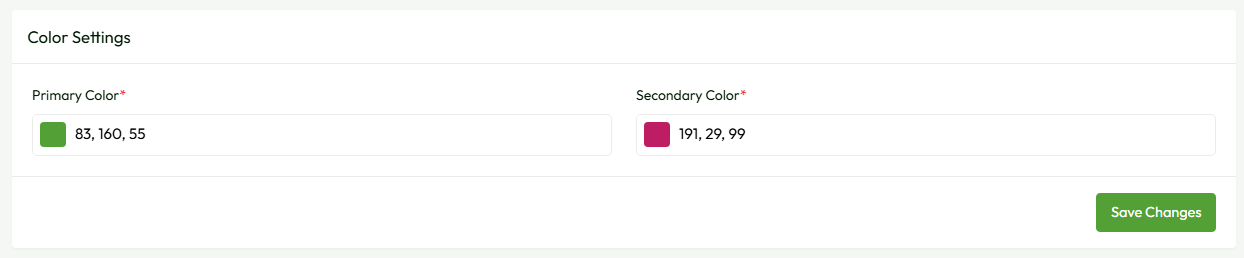
How to change the primary and secondary colors of the application globally?
-
Color Setting : Navigate to
Admin panel->App Setting->General Settings. You can update the "Primary and Secondary" colors of the application according to your choices with this setting. - Primary Color : To change the primary colour of your application, please click on the (RGBA) "Primary color" input field and set the color of your choice, then click on the "Save Changes" button to see the change on the application globally.
- Secondary Color : To change the secondary colour of your application, please click on the (RGBA) "Secondary color" input field and set the color of your choice, then click on the "Save Changes" button to see the change on the application globally.
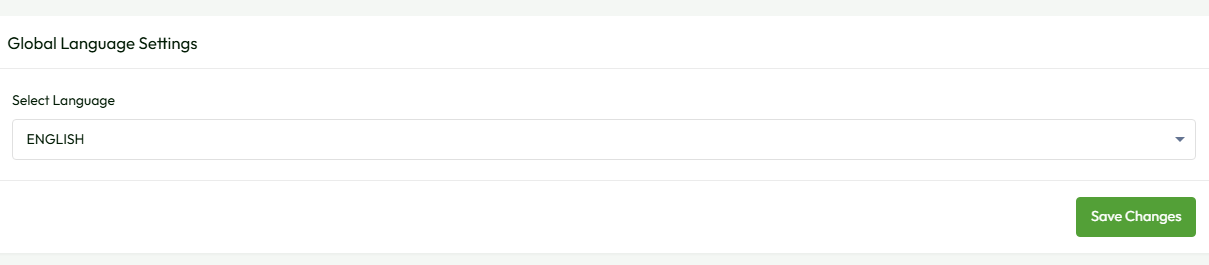
How to change the language and version (LTR to RTL) of the application globally?
-
Global Language Setting : Navigate to
Admin panel->App Setting->General Settings. With this feature, you can change the application's "Language and Version" (LTR to RTL) according to your choices. - Language & Version : Here, by default, we provided a total of fifteen languages. For example, if you select the Arabic (AR) language from the language dropdown, then the whole application will convert into the Arabic language as well as change the version from LTR to RTL.
Note : Please click on the “Save Changes” button after selecting the language.
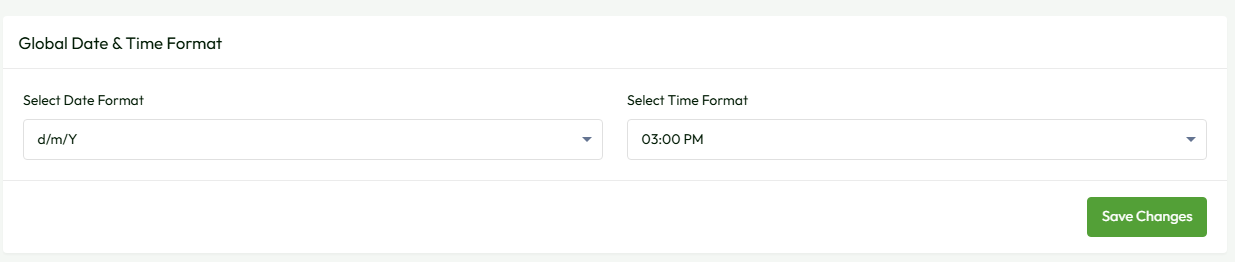
How to change the Date and Time Formats of the application globally?
-
Global Date & Time Format: Navigate to the
Admin panel->App Setting->General Settings. You can update the "Date and Time" formats of the application according to your choices with this setting. - Select Date Format : To change the date format of your application, please click on the "Select Date Format" dropdown and set the "Date Format" according to your choice, then click on the "Save Changes" button to see the change on the application globally.
- Select Time Format : To change the time format of your application, please click on the "Select Time Format" dropdown and set the "Time Format" according to your choice, then click on the "Save Changes" button to see the change on the application globally.
How to use Two Factor Authentication Settings?
-
Two Factor Authentication Settings: Within the
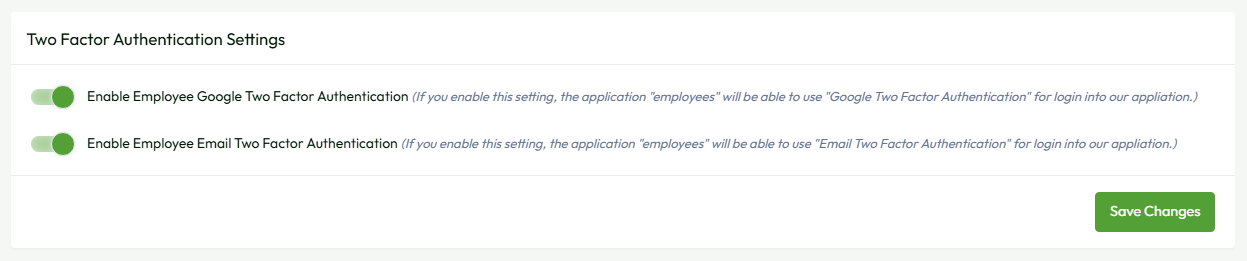
Admin Panel -> App Settings -> General Settingspage, the "Two Factor Authentication Settings" section allows administrators to configure authentication options for employees. - Configuration Options:
- Two toggle switches are available:
- "Enable Employee Google Two Factor Authentication": Enables Google Two Factor Authentication for employee logins.
- "Enable Employee Email Two Factor Authentication": Enables Email Two Factor Authentication for employee logins.
-
Overview:
- "With these settings, administrators can enhance security by enabling Two Factor Authentication (2FA) methods for employees.
- "Google Two Factor Authentication utilizes Google Authenticator or similar apps to generate authentication codes.
- "Email Two Factor Authentication sends a verification code to the user's email address for login confirmation.
- "Administrators can tailor authentication settings based on the security requirements and preferences of their organization and users.
How to change footer text?
-
Footer Copyright Text : Navigate to
Admin panel->App Setting->General Settings. Using the summer note editor, you can change the applications' footer text. As shown in the below image, - If you don’t want to display any content in the footer section, please leave it empty.
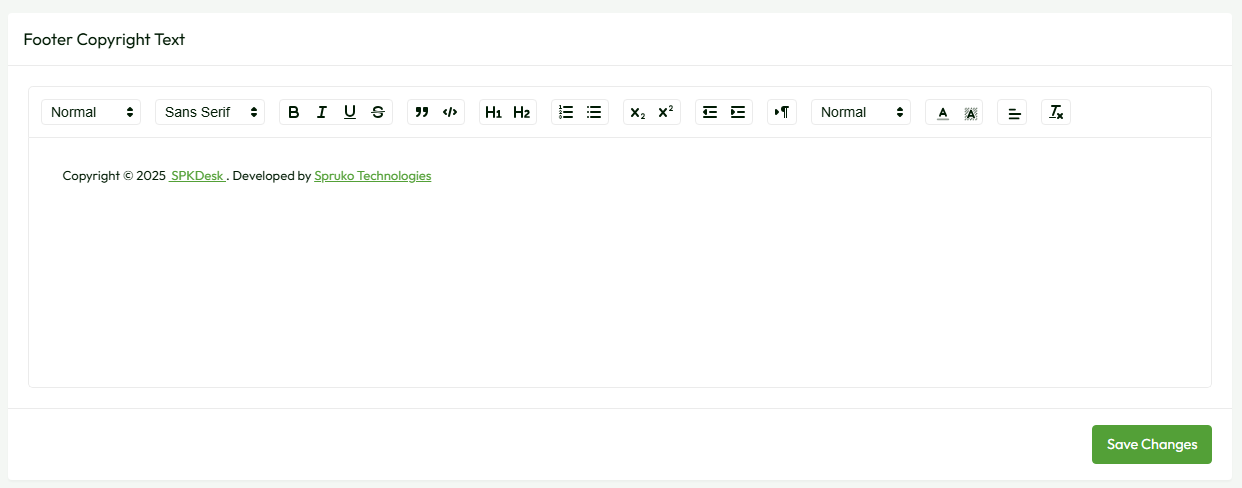
Note : Please click on the “Save Changes” button after customizing the footer text in the summer note.
2. Supervisor Configuration
-
Supervisor : Basically, "Supervisor" is a process monitor for the operating systems, and will automatically restart your
queue:workandwebsocket:serveprocesses if they fail.
If your system doesn’t have Supervisor installed, please follow the steps below. Skip this section if it is already installed.
- To install supervisor, through apt package manager please execute the below commands .
-
sudo apt update && sudo apt upgrade -y -
sudo apt install supervisor -y -
sudo systemctl status supervisor
- To install supervisor, through yum package manager please execute the below commands .
-
sudo yum install epel-release -
sudo yum -y install supervisor -
sudo systemctl enable supervisord -
sudo systemctl start supervisord -
sudo systemctl status supervisord
How to Manage and Set Up Supervisor?
-
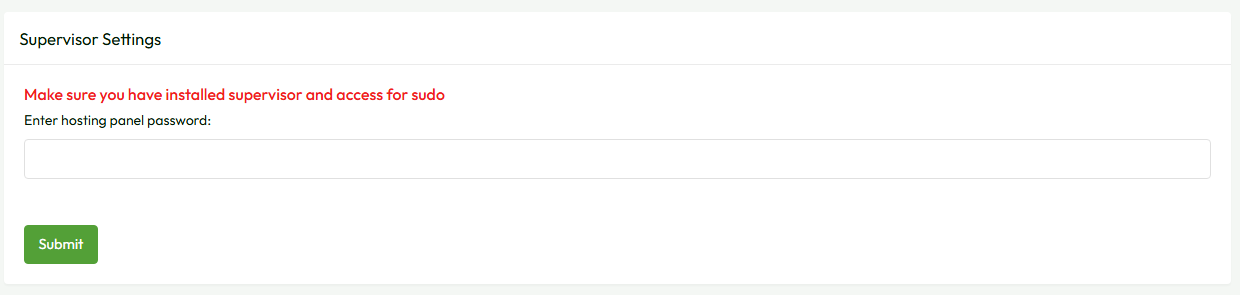
Setup: If the Supervisor configuration was skipped during the installation process, it can be completed here. If it was already configured, you can simply check the Supervisor status. To navigate to the Supervisor configuration, go to
Admin Panel → App Settings → Supervisor Configuration.
- The page is secured by the admin password. Enter the required admin password in the input field and click the "Submit" button.
- After entering the correct password, you will be redirected to a page where you need to enter the "Server Hosting Panel Password" and click the "Submit" button.
- The status of Supervisor will be displayed. If the status is "inactive" or "dead", a Restart button will appear. Clicking the Restart button will attempt to restart Supervisor.

3. Websocket/Pusher Setup
How to setup socket?
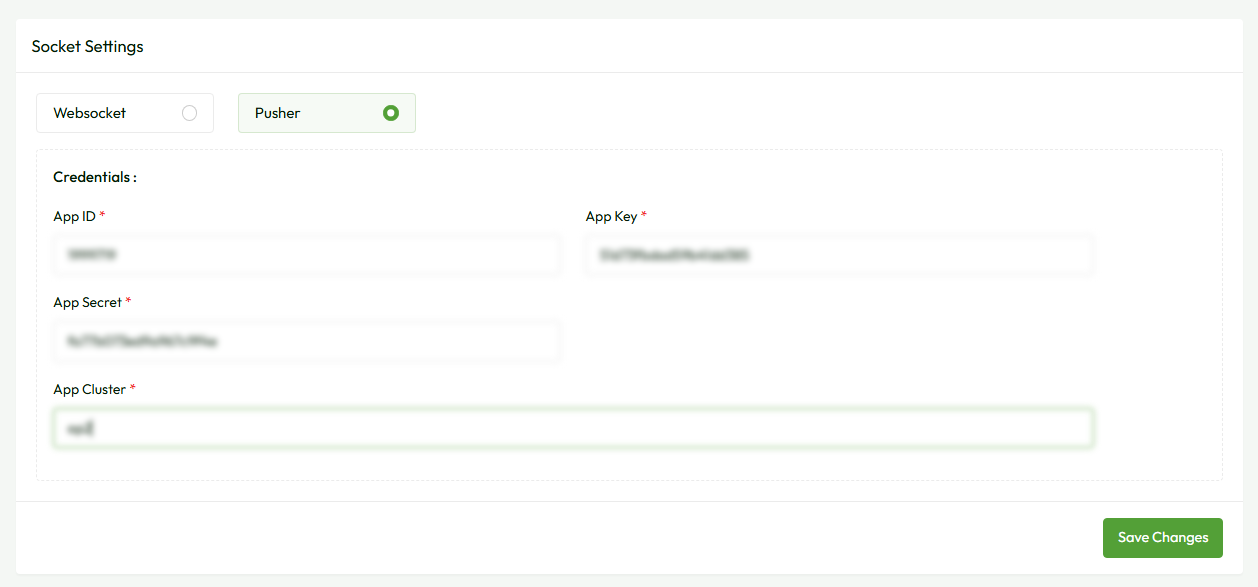
You need to select required type
- WebSocket: The WhatsDesk application requires WebSocket for real-time, two-way communication between the client and the server. You must provide the Server Hosting Panel Password and Port Number. Ensure the panel password is correct; if you do not have access, please contact your server administrator.
- Pusher: To use the Pusher socket, first you need to create an app on pusher.com and provide the credentials (App ID, App Key, App Secret, Cluster) in the respective input fields.
Note : Make sure you have provided the SSL certificate and key in General Settings to use WebSocket..
Note : Please click on the “Save Changes” button after selecting the socket type.
4. Whatsapp Settings
- Go to the Developer Portal: Visit https://developers.facebook.com and log in with your Facebook account.
-
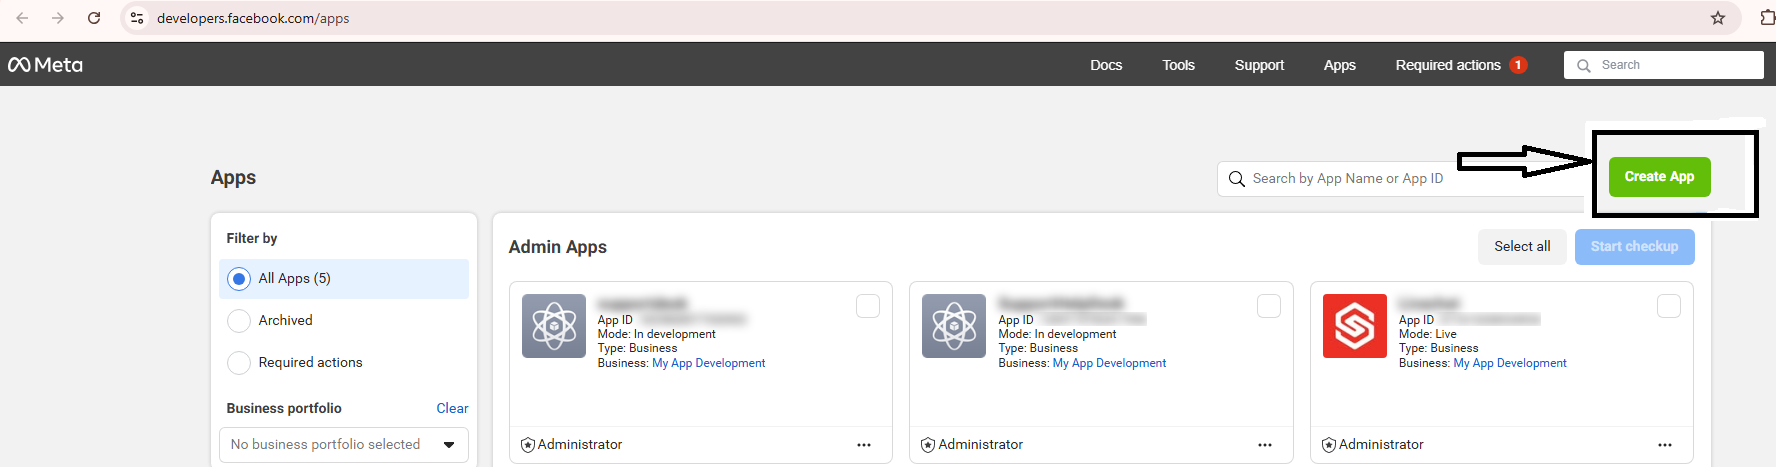
Navigate to ‘My Apps’
In the top right, click on “My Apps”, then click “Create App”.
-
Choose the App Type
You’ll be asked to select an app type. Select Business option the one that fits your project best and click Next.
-
Fill in App Details
- App Name
- App contact email
- (Optionally) select a Business Account if relevant
Then click Create App.
-
Add and Configure WhatsApp Product in the App
-
Add the WhatsApp Product
- On your app's dashboard, scroll down to the “Add Products to Your App” section.
- Find “WhatsApp” and click the “Set Up” button next to it.
- This adds WhatsApp to your app’s left sidebar for further configuration.
-
Open WhatsApp API Settings
- In the left sidebar, click on “WhatsApp” > “API Setup”.
- You’ll now be able to access details for setting up your integration.
-
Get Your Phone Number Details
In the API Setup section, you will see:
- Phone Number ID
- WhatsApp Business Account ID (WABA ID)
You can either use the test number provided by Meta (for sandboxing) or connect your own number through Business Manager.
-
Configuring webhook
- Click on “WhatsApp” > “Configuration”.
- In the Webhook section:
- Enter your Webhook Callback URL — this is the endpoint on your server where you want to receive WhatsApp events
- Enter a Verify Token — this is a string used to verify the webhook connection
- You can use the default Verify Token from a demo or test setup, Or you can create your own custom token (e.g., mySecureToken123).
- In the Webhook fields , Subscribe to messages
NOTE: VerifyToken entered in Meta’s Webhook Configuration (under WhatsApp > Configuration in the App Dashboard) is Used in your backend server code to validate incoming webhook requests. Should match exactly in integration settings in the project .
-
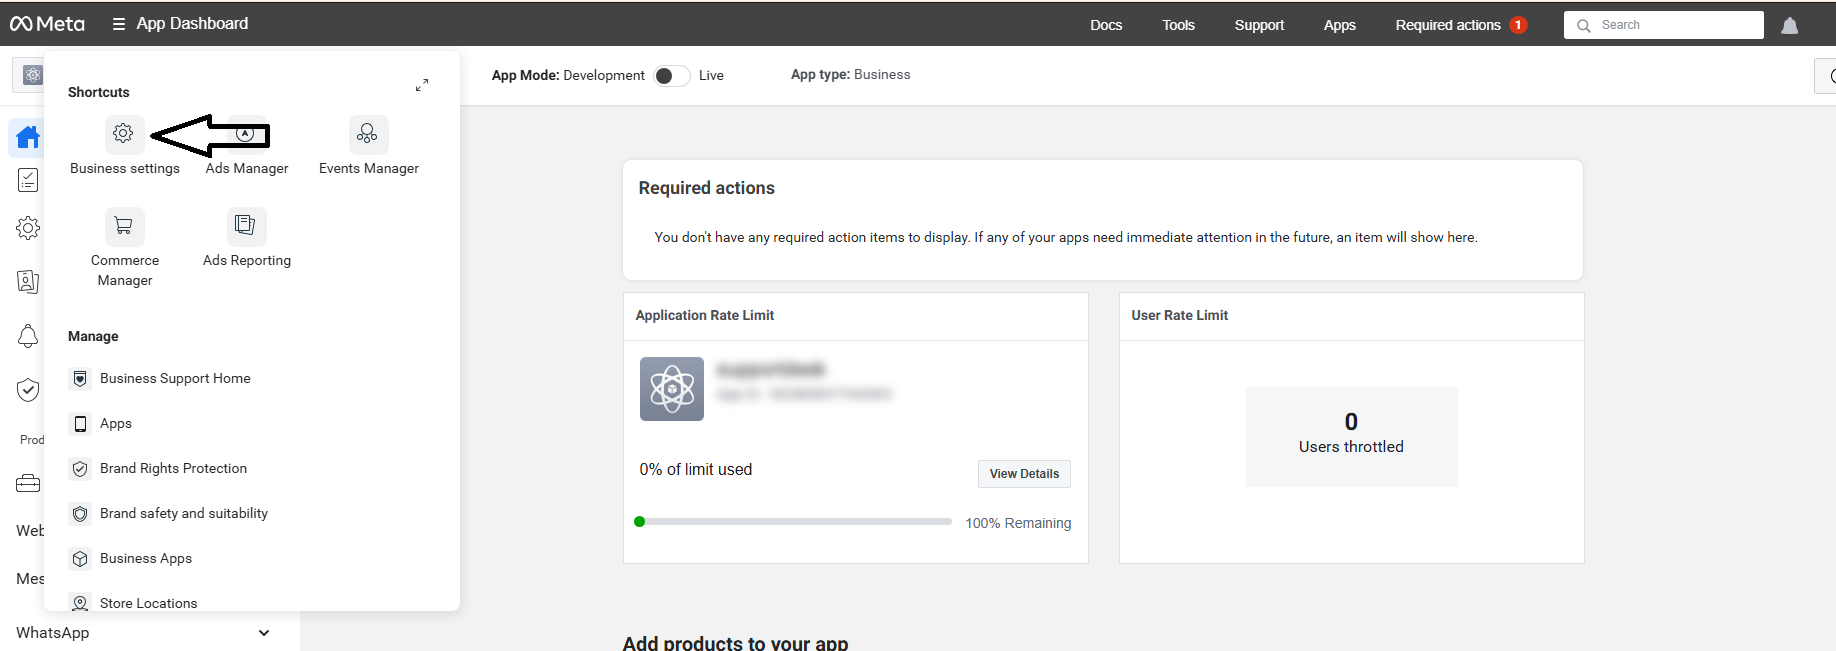
Add the WhatsApp Product
- Click on the App Dashboard in the left sidebar on the top side. Go to Business Settings. This redirects you to Meta Business Suite for deeper configuration.
-
Create a System User
In the Business Settings menu:
- Click on “Users” > “System Users”.
- Click “Add” to create a new System User if one doesn’t already exist.
- Give a name
- Choose an Admin role
-
Assign Assets to the System User
After creating the system user:
- Click on the new user.
- Assign your app to this system user by clicking “Add Assets”, choosing your app, and setting Full Control access.
-
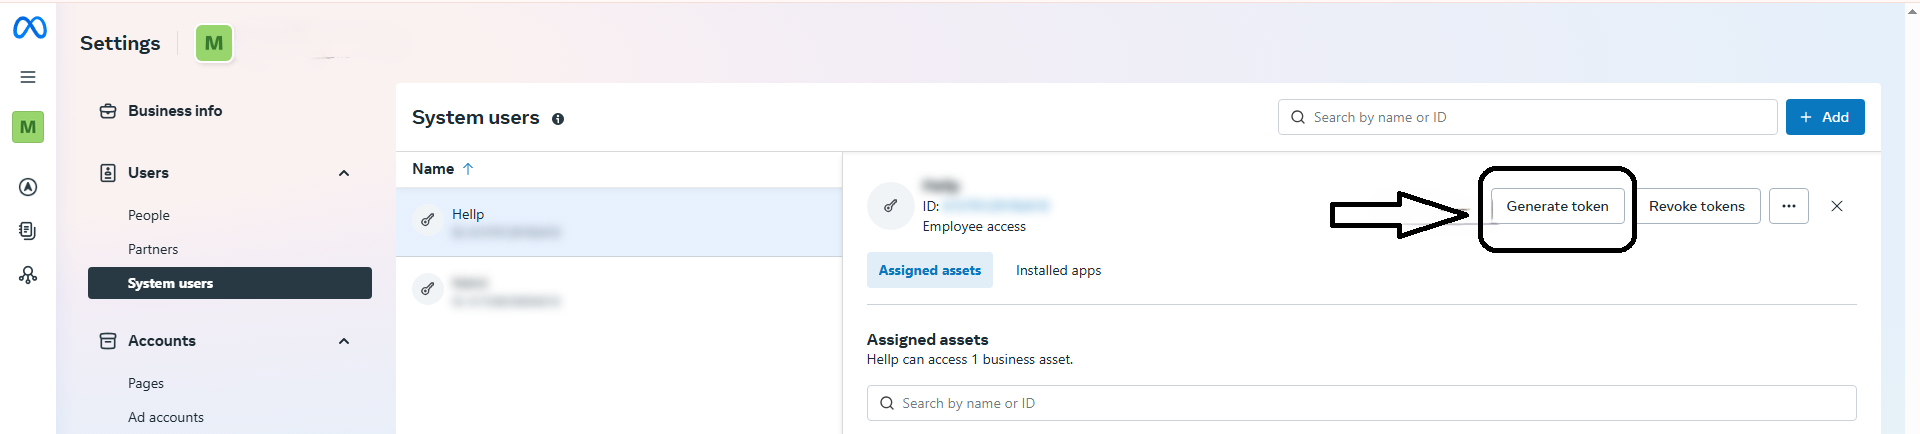
Generate a Token
- Go to “System Users”, click the system user you just created.
- Click “Generate Token”.
- Select your app from the dropdown.
- Set the token expiration (usually “Never” for long-lived system users).
- Select Permissions:
- business_management
- whatsapp_business_messaging
- whatsapp_business_management
- whatsapp_business_manage_events
- Click “Generate Token” and copy it immediately — it will not be shown again.
Note : For production use, your number must be verified and approved.
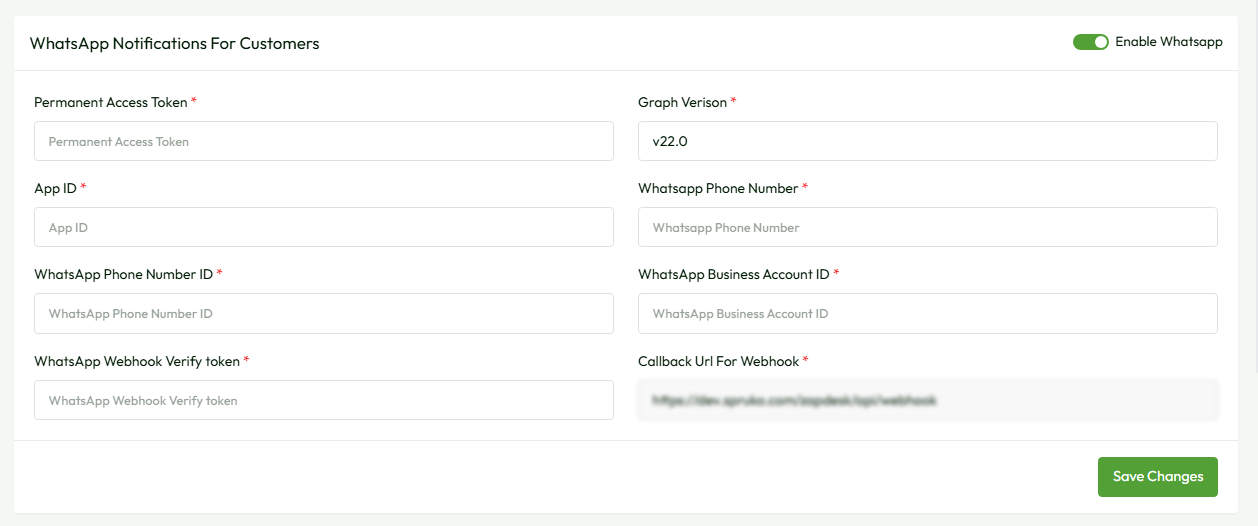
Now provide all the required details in the whatsapp settings page
Please enable whatsapp switch
Note :Please visit the Facebook Developers website for the latest updates.
WhatsApp Widget Integration
The WhatsApp Widget Integration feature provides an external script link that can be easily embedded into any website. This allows businesses to seamlessly integrate the WhatsApp widget, enabling customers to start a conversation directly through WhatsApp with just one click.

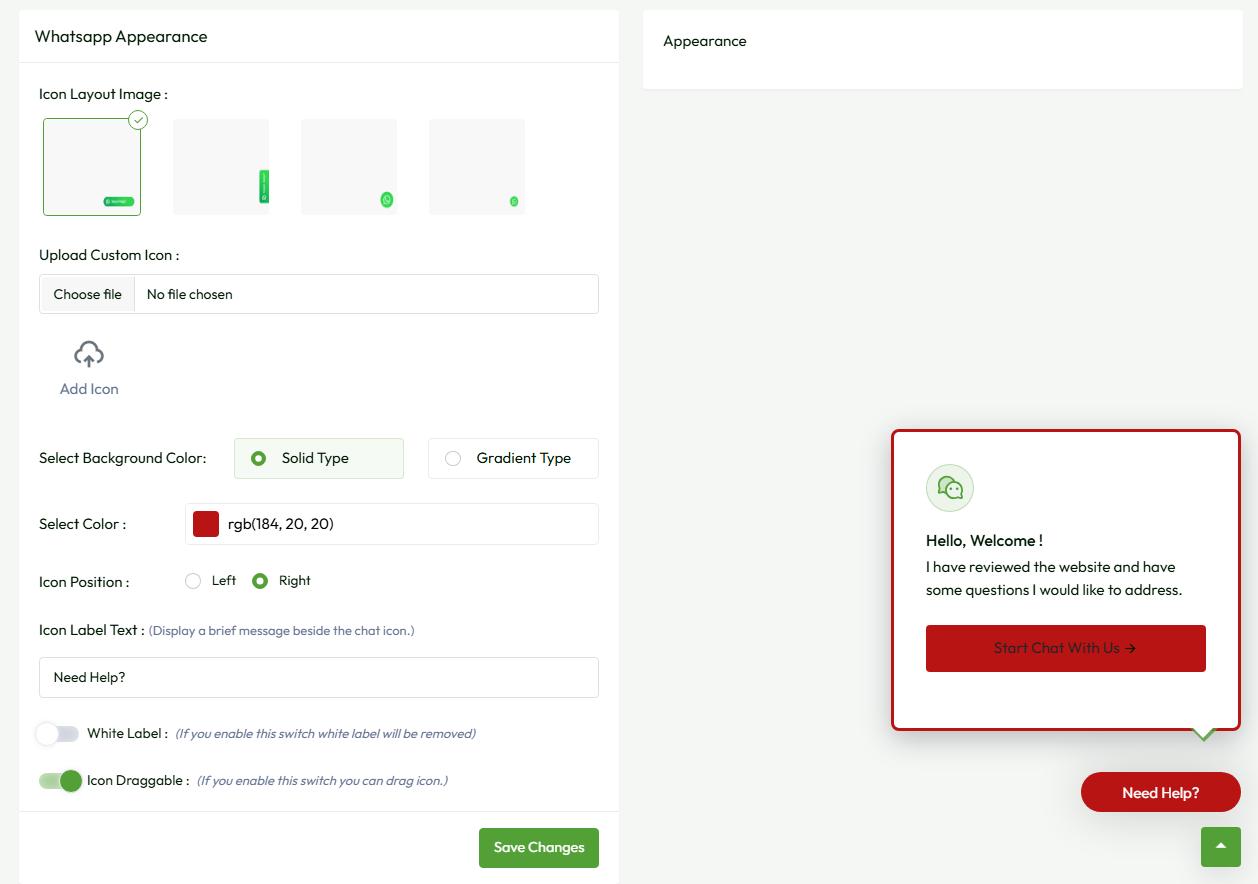
Whatsapp Appearance
- Choose Layout – Select the desired layout for your WhatsApp button.
- Upload Custom Icon – Click the input field to upload your own icon.
- Select Color – Customize the icon or background color.
- Icon Position – Choose where the icon appears on the screen.
- Icon Label Text – Enter the label text that appears next to the icon.
- Icon Draggable – Enable or disable the option to drag the icon.
5. Ticket Settings
- Custom Ticket Id :This feature is used to customize Simply customise your ticket ID. For example, SPT-1 is the ticket id. You can only customise the first letters of the ticket ID of your choice. It displays SPT-1 for user.
- Auto Delete Notifications Enable : If you disable this notification setting, read notification won’t be deleted from panel. If it is enabled, then the read notifications will be deleted after the completion of the mentioned days in the input field .
- Ticket Description : Ask the customer to provide a description of the issue.
- Webhook Name : Messages sent via webhook will appear in the ticket conversation as provided name.
- File Upload Permission Not Granted: This message will be sent if the user is not permitted to upload files in the ticket conversation.
- Customer Or Ticket Violation: you can violate any customer and you will know that the customer is violated and you can do what is needed..
- Customer File Uploads for Ticket:If you disable this ticket setting, the "File Upload" option will disappear from the create ticket page, while creating or replying to the ticket...
- Feedback Survey Enabled: If you enable this ticket setting, the survey options will appear.
File Settings:
-
Customer File Settings:
Includes maximum number of file uploads, maximum file size, and allowed file types.
-
Employee File Settings:
Includes maximum number of file uploads, maximum file size, and allowed file types.
Note : Please click on the “Save Changes” button after setting up . .
6. Email Setting
-
Email Setting : This settings page serves the purpose of facilitating the sending and receiving of emails within the application, encompassing SMTP/Send Mail and IMAP configurations. To set up these parameters, kindly go to the
Admin Panel->App Setting->Email Setting, and finally access the Email Settings page. Follow the outlined process to configure the settings accordingly.
-
Send Test Mail : The application offers a valuable feature called "Send Test Mail" that allows you to preview how your emails will appear in your customers' inboxes. To utilize this option, start by completing the necessary details in the "SMTP/Send Mail" section provided below. Once you've filled out the required information, you can easily use the "Send Test Mail" option to access the email's presentation.
Now please enter a valid email address in the input filed and click the "Send" button to test the "Send Test Mail" option.

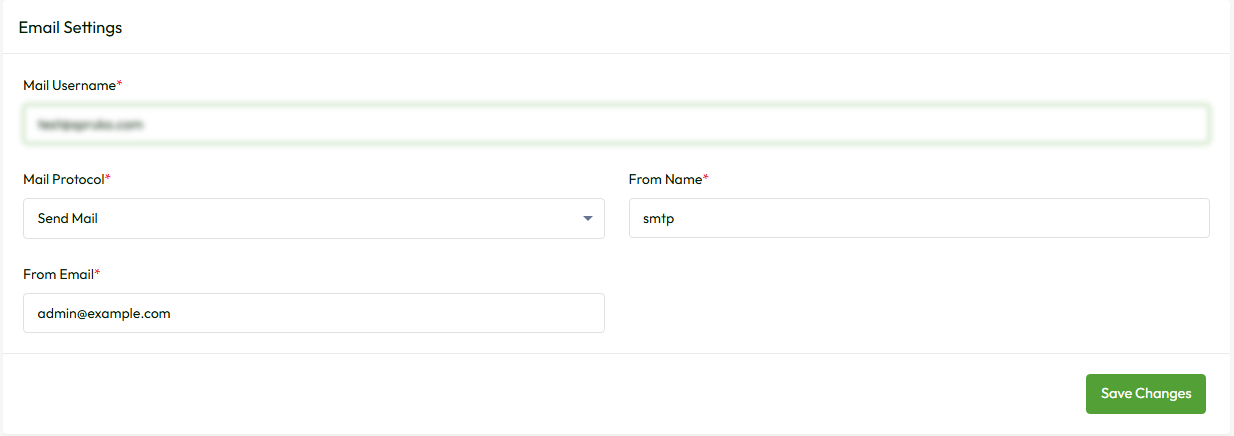
- SMTP/Send Mail : SMTP/Send Mail offers two choices: "Sendmail" and "SMTP." You have the flexibility to opt for either option, but it is essential to configure the details based on your host server or the specific single-domain emails you are utilizing.
-
Sendmail : If you opt for the "Sendmail" feature, ensure that the provided details align with those of the host server where your application is hosted. Input the relevant information for "Sendmail" as provided by your hosting provider. Once entered, click on the “Save Changes” button to implement the updates and activate this functionality.
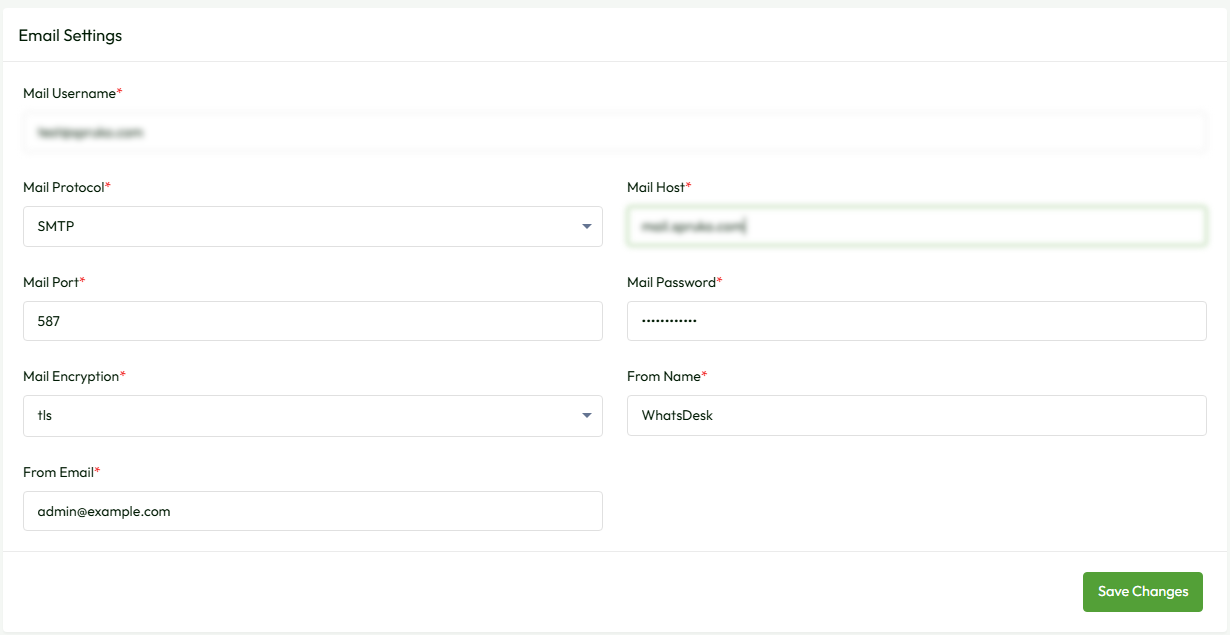
Note: Please be aware that when utilizing the "Sendmail" option, there is no requirement to input values in the "Mail Username" and "Mail Password" fields. - SMTP : If you are using the "SMTP" option, then you need to fill out all the input fields in the "SMTP" form to connect with the host that you wish to use in the application.
- To set up server SMTP settings. Please follow this guide, or for reference video click here.
- To set up Gmail SMTP settings. Please follow this guide, or for reference video click here.
7.Custom JS & CSS
-
Custom CSS and JavaScript : This feature is used to customize the "CSS and JS." To use this feature, navigate to
Admin Panel->App Setting->Custom CSS and JavaScriptand follow the below given instructions. - Custom CSS : Now you can customize your application styles by using custom CSS. And please do not use any tags, ex: , while writing CSS code.
- Custom JS : Now you can customize your application JavaScript by using custom JS. And please do not use any tags, ex: , while writing JS code.
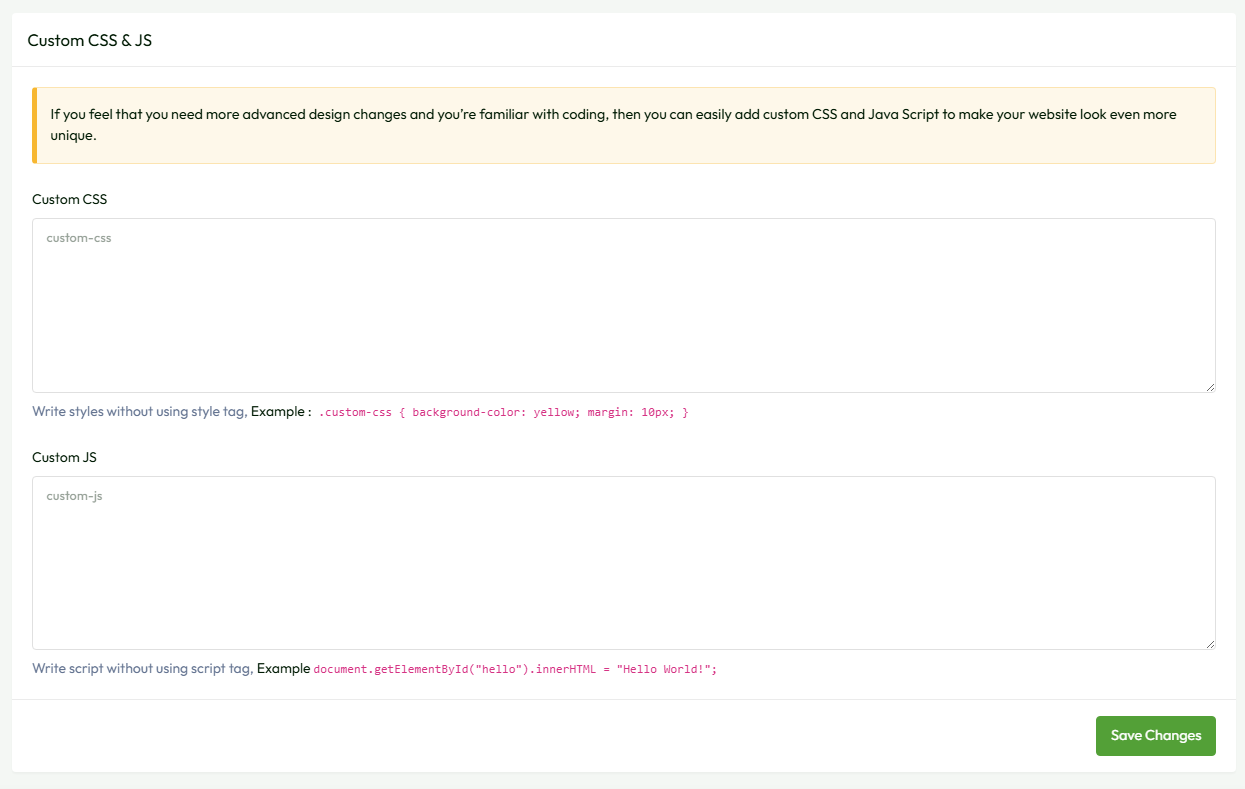
Note : Please click on the “Save Changes” button after setting up your custom CSS and JS. .
8. Captcha Settings
How to setup Captcha setting?
-
Captcha Settings : This setting protects against any system-generated attacks like DoS attacks. To use this setting in the application, go to
Admin Panel->App Setting->Captcha Settingpage. - Captcha Disable : Both manual and Google reCaptcha settings are deactivated or disabled by default in the application. Two captchas cannot be used at the same time.
- Manual Captcha Enable : To enable "Manual captcha" in your application, simply click on the switch button. However, if you use manual captcha, the other one, "Google reCaptcha," will be automatically disabled.
-
Google Captcha Enable : If you want to use "Google reCaptcha," you must first configure Google reCaptcha's settings and get the "Site Key" and "Secret Key." Please visit the official site to create those two keys: https://www.google.com/recaptcha/admin/create and follow the instructions as given.
Assuming that you have generated a "Site Key" and a "Secret Key". Now copy those two keys and paste them in the input field of "Google Re-Captcha Setting" and click on the "Save Changes" button. To use Google reCaptcha in the application, please enable the “Google Captcha Enable” toggle switch button from the above section.Note: Please use only "reCAPTCHA v2" to generate "Site Key" and "Secret Key". -
Captcha Setting in Forms : You must enable the switch of the form as shown in the below image if you wish to use one of the above two, "Manual Captcha" or "Google reCaptcha" in them.

For example, if you want to use manual captcha in the above-mentioned form, you must first activate the "Manual Captcha Enable" switch button from the above section, then enable the switch button of the forms where you want to use manual captcha.
9. Payment Gateways
How to setup Captcha setting?
- Stripe Settings: Includes fields for Stripe Key and Stripe Secret. You can also set it as default and click "Submit".
- PayPal Settings: Includes fields for PayPal Key and Secret. You can also set it as default and click "Submit".
- Refund Settings: Specify the number of days allowed for customer refund requests.
NOTE: Make sure to enable atleast one either Stripe or Paypal.
10. Security Setting
-
Security Setting : In this application, we implemented three different types of security settings: "Country Block/Unblock", "Admin Country Block/Unblock", and "DOS Attack". And they are unique in their functionality. To use this setting, navigate to the
Admin Panel->App Setting->Security Settingpage and follow the below process. -
Admin Country Block/Unblock : This setting is used to "Block" or "Allow" countries from accessing the application of the admin URL: https://app.spruko.com/mydesk, which is on the admin side.
If you want to "Block" or "Allow" a country or multiple countries, then click and select the countries from the "Select Country" dropdown and click on the "Save changes" button to block or allow the countries you selected.
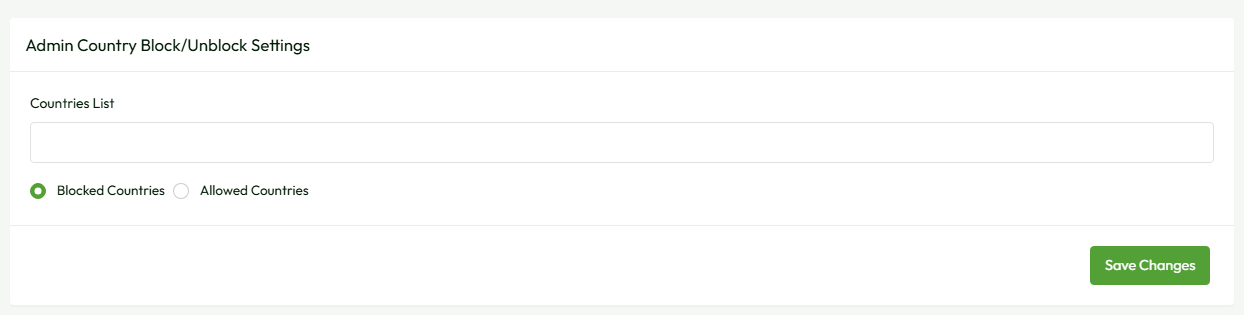
By default, all countries are allowed to use the application. If the "Select Country" dropdown is left empty, then any country can access the application's admin URL:https://app.spruko.com/mydesk.
Note: You are not allowed to block your own country. - DOS Attack Setting : This setting secures the application from denial-of-service (DoS) attacks.
-
You have two input fields in the DoS attack setting. The first input indicates "Attempts" and the second input indicates "Seconds." For example, if 10 "attempts" in 30 "seconds" come from a particular IP address, then that IP address will be blocked or the user may be redirected to a captcha page, depending on the option you choose.
Example: First enable the toggle switch button, choose the "View Captcha" option from the "DOS Attack Setting" section and set 10 in the first input field ("Attempts") and 30 in the second input field ("Seconds") and click on the "Save Changes" button. If a user tries to access the application 10 times in 30 seconds, his or her IP address will be temporarily blocked and he or she will be redirected to the captcha page. Or if you choose "Block IP Address", then it will block the IP address permanently. If you don't want to use this feature, simply click on the above toggle switch button to disable it.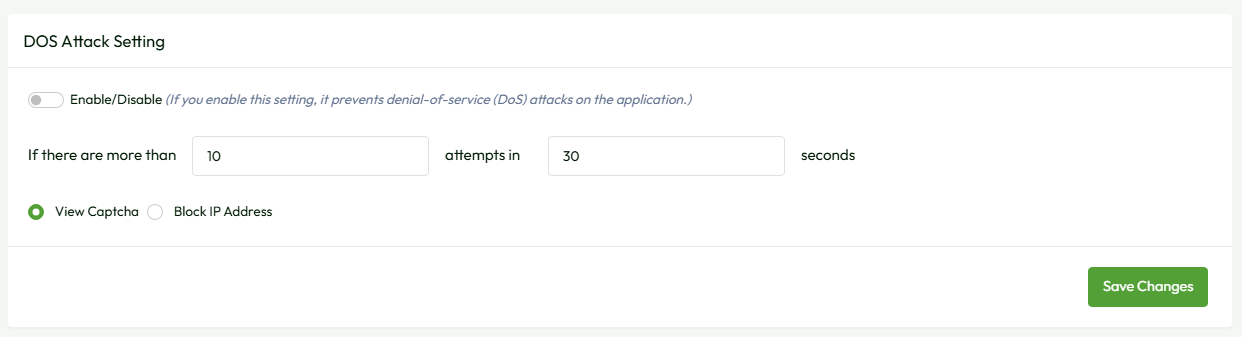
- Configuration Options:
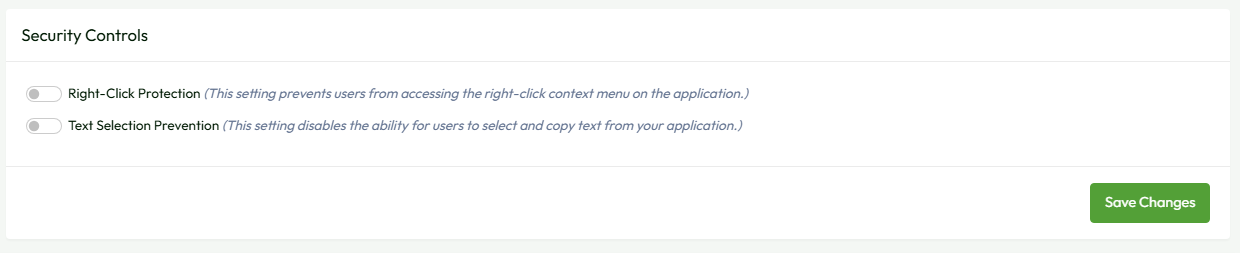
- This section features two toggle switches:
- Right-Click Protection: When enabled, users are prevented from accessing the right-click context menu within the application, enhancing protection against unauthorized actions.
- Text Selection Prevention: Enabling this setting disables users' ability to select and copy text from the application, thereby safeguarding sensitive content.
-
Overview:
- These security settings provide administrators with tools to mitigate risks and protect sensitive information within the application environment.
- "Right-Click Protection" helps prevent unauthorized actions or data extraction by limiting users' access to context menu functionalities.
- "Text Selection Prevention" enhances data security by restricting users' ability to copy and extract text, minimizing the risk of unauthorized data replication or misuse.
How do I set up DoS attack settings and get a basic overview?
How to use Security controls Settings?
11. IP List
-
IP List : All temporary and permanently blocked IP addresses are displayed in the "IP List" table, and you can also add IP addresses manually by clicking on the "Add IP Address" button in the "IP List" table.
When you click on the "Add IP Address" button in the "IP List" table, a modal pop-up will appear with the "IP" input field and "Type". Fill in the input field and select the option from the "Type" and click on the "Save" button to apply the changes.
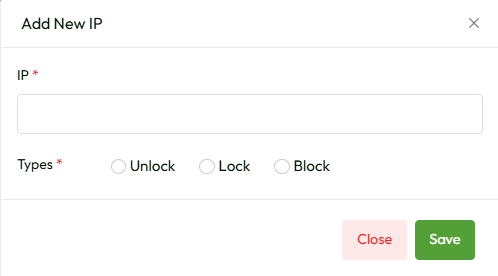
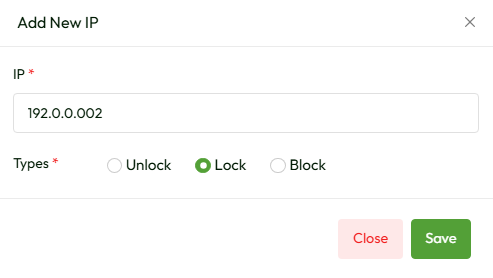
- Unlock : You can "unlock" and make the IP addresses normal so users can access the application.
- Lock : You can "Lock" the IP addresses and make users to access the application temporally with captcha.
-
Block : You can "Block" IP addresses, and users won't be able to access the application permanently until the IP addresses are "unlocked."
Here there are three more options. Edit, Delete, and Reset in the “Actions” column on the "IP List" table.
- Edit : By clicking on the edit option in the “Actions” column you update the IP addresses using the above options.
- Delete : You can also delete the records of IP addresses permanently. So that users are allowed to access the application.
-
Reset : You can also reset the IP addresses. It works the same as the unlock option so that users are allowed to access the application.
Note :Please click on the “Save” button after you add or edit the IP addresses.