Copyright © 2025 LivaChat-SaaS. Designed with by Spruko All rights reserved.
Note : Please note that any changes made to the original source code will be lost after updating to the latest versions.
LivaChat-Saas Laravel LiveChat Application
Android Application Installation Guide
This guide walks you through customizing and building your own Android APK version of the LiveChat web application. Follow the steps carefully to brand and configure your app before releasing it.
Watch the full installation process on YouTube:
What You Can Customize
- App Name: The name displayed below your app icon on Android devices.
- Package ID (applicationId): Required if you plan to publish the app or enable Firebase Push Notifications.
-
Server URL: The LiveChat admin or dashboard URL linked to your web application.
Keep /admin?embed=1in the URL to preserve the app’s layout and design. - Launcher Icon: Main app icon.
- Splash Screen: Image displayed while the app is loading.
- Notification Icon: The small white icon that appears in the Android status bar (must be a transparent white PNG).
Note: Icons and splash images are native assets. Any change requires a rebuild to apply updates.
📋 Prerequisites
- Android Studio installed on your computer.
- Node.js version 18 or higher.
- Your own Firebase project (only if you are using Firebase Push Notifications).
🚀 Setup Steps
To begin the setup, first copy the configuration file by duplicating
brand.config.example.json and renaming it to brand.config.json.
This new file will store your branding and configuration details.
Next, replace the branding assets located in the branding folder.
You’ll need to substitute the default image files with your own:
icon.png— the application launcher iconsplash.png— the splash screen displayed during startupic_stat_livechat.png— the notification icon used for push alerts
Important: Do not rename these files. Replace the images only, keeping the filenames identical to ensure proper loading during the build process.
After updating the assets, edit the brand.config.json file to customize your app’s configuration.
Update the following fields as required:
- appName: The display name of your application (for example, “YourCo Chat”).
- packageId: A unique identifier, such as
com.yourco.livechat. This is required if you plan to publish the app or enable Firebase Push Notifications. - serverUrl: The hosted URL of your LiveChat application.
- allowNavigation: Hosted domain name.
- enablePush: Set this to
falseunless you plan to configure Firebase Push Notifications.
If you include a packageId, you must also add the following import statement
to the file located at
android → app → src → main → java → MyFirebaseMessagingService.java:
import packagename.R; // Example: import com.testpackage.R;Once your configuration is set, generate the icons and splash assets by running the following commands:
npm installnpm run brand:assetsAfter the assets are generated, apply your branding to the native Android configuration by executing:
npm run brand:applyVerify Your Android Drawable Images
After running the assets command, please confirm that all branding images have been properly updated in:
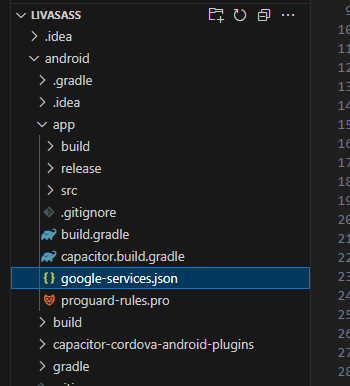
android ->app ->src ->main ->res ->drawable
- ic_stat_livechat.png
- splash.png
- splash_big.png
- splash_icon_placeholder.png
If any of these files are not replaced automatically, please open the above folder and manually copy your original images into it, using the same file names to ensure correct loading inside the app.
📲 (Optional) Firebase Setup Process for Push Notifications
If you plan to use Firebase Push Notifications, set enablePush to
true in brand.config.json and complete the following steps:
- Go to the Firebase Console and click Add project (or Create project). Name your project.
- Choose a Project ID that you can keep long-term. This identifier will not change later.
-
Add an Android app to your project and set the Package name (for example,
com.test). -
Download the
google-services.jsonfile and copy it into your Android application at:android → app.
Connect Firebase to Your Laravel “Live Chat Web Application”
Using the same Firebase project:
- Navigate to Project settings → Service accounts.
- Click Generate new private key, choose JSON, and download the file.
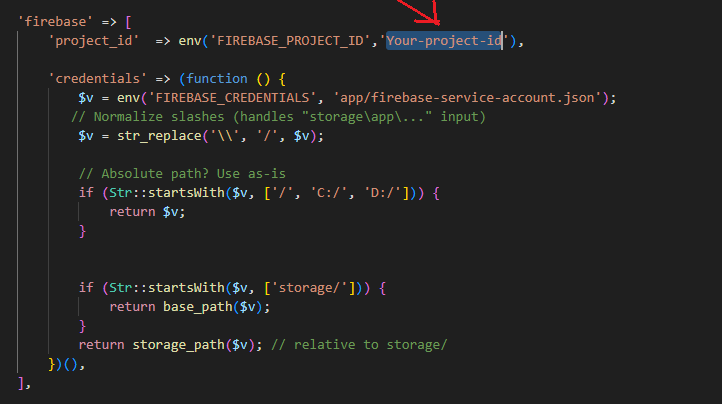
-
Use your firebase projectId in laravel web application at
config->services.
enablePush set to
false and skip this section.
Sync Native Project & Build APK
To finalize the setup, open the project in Android Studio by running:
npx cap open android
Next synchronize your Android project using the command below:
npx cap sync android
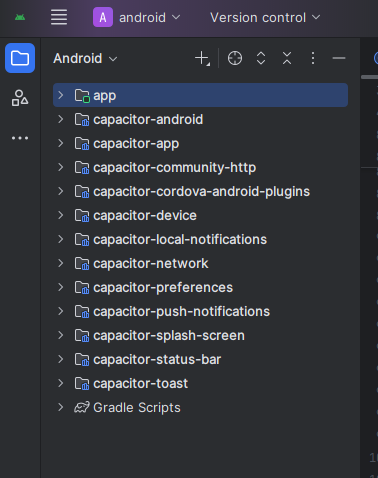
This will sync the android project, it may take some time after complete build the folder structure in android studio will be like this.
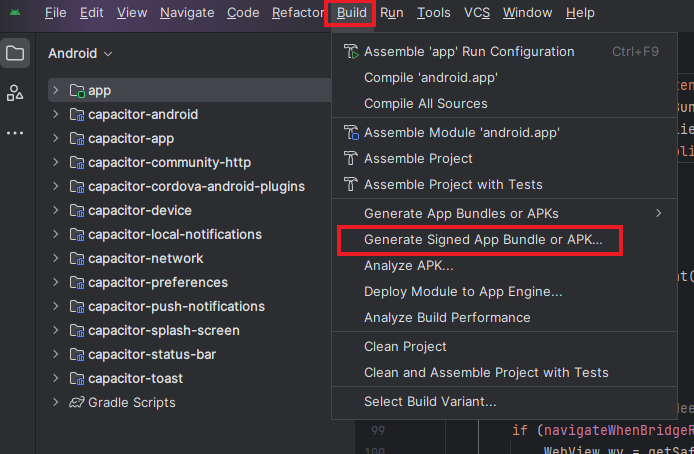
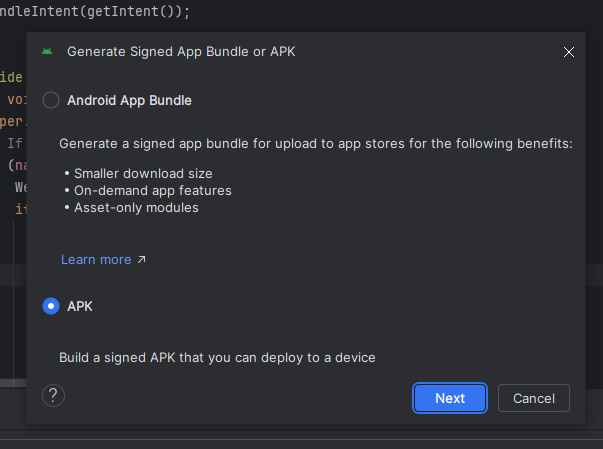
Now to build the project From Android Studio Top Menu -> Build -> Click on Generate Signed App Bundle or Apk -> Choose APK -> Next -> Create a new Keystore Path and click on Next.
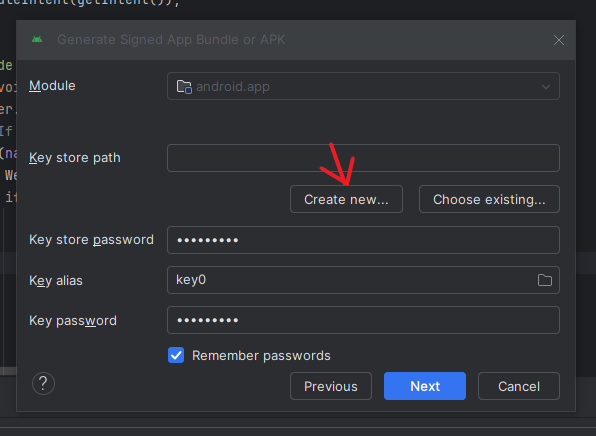
** Note : Keystore path and keys should store, because it is very important for the next updates only once it can be generated
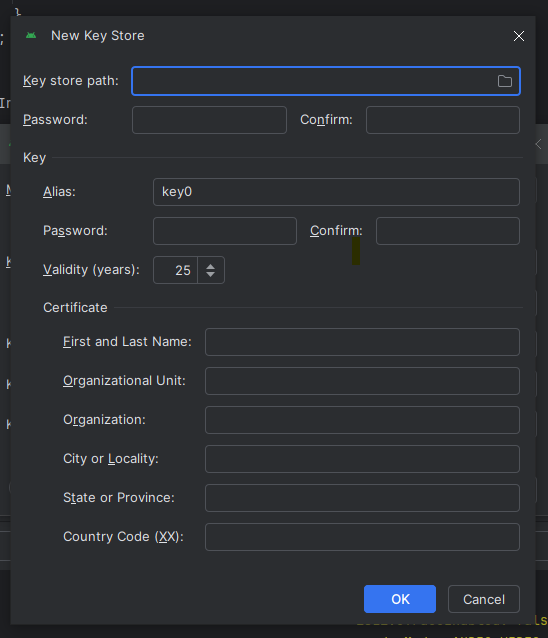
Fill all the details and click OK and after release
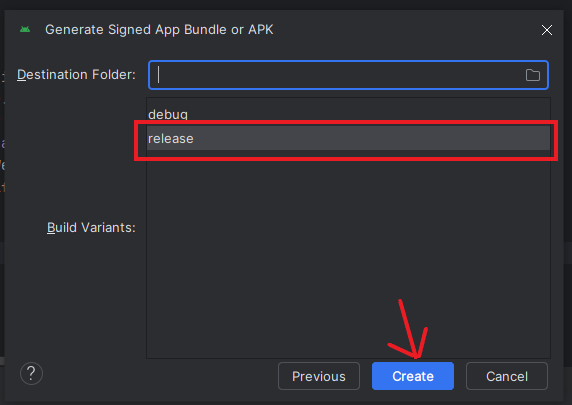
Now it will generate the release version apk. It will take some time to build apk, you will be notified once it's done. You can find this under livasaas app project -> release -> app-release.apk
Now you can share this apk to your subscribers and employees for login to application using apk to receive notifications.
** Note: For domain transfers, app should be rebuild again by following the above steps, since it changes the hosted url, it will display install page again. Hence follow Setup Steps again after domain transfer and rebuild the project.
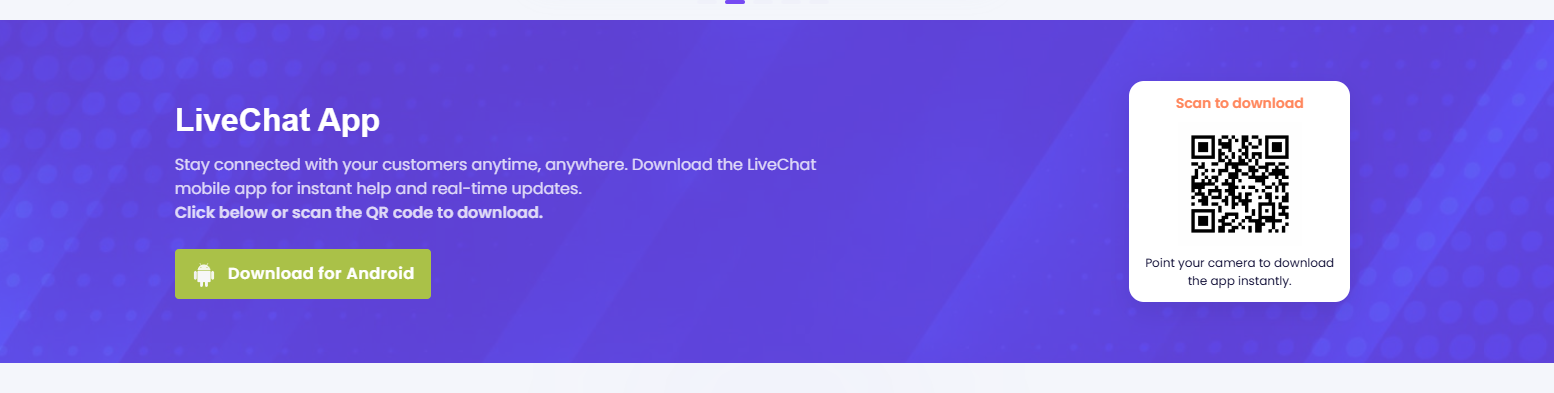
Uploading and Downloading the Android APK
After you generate your app-release.apk, you can upload it to your Live Chat web application so that subscribers or agents can download it from the home page and sign in using the mobile app.
How to Upload the APK
- Navigate to Live Chat → Live Chat Settings → Live Chat App Upload.
- Upload the
app-release.apkfile. - Upload the
firebase.jsonfile which you have downloaded from firebase console. - Wait for the upload to complete. Once finished, the APK download link will appear on the home page.
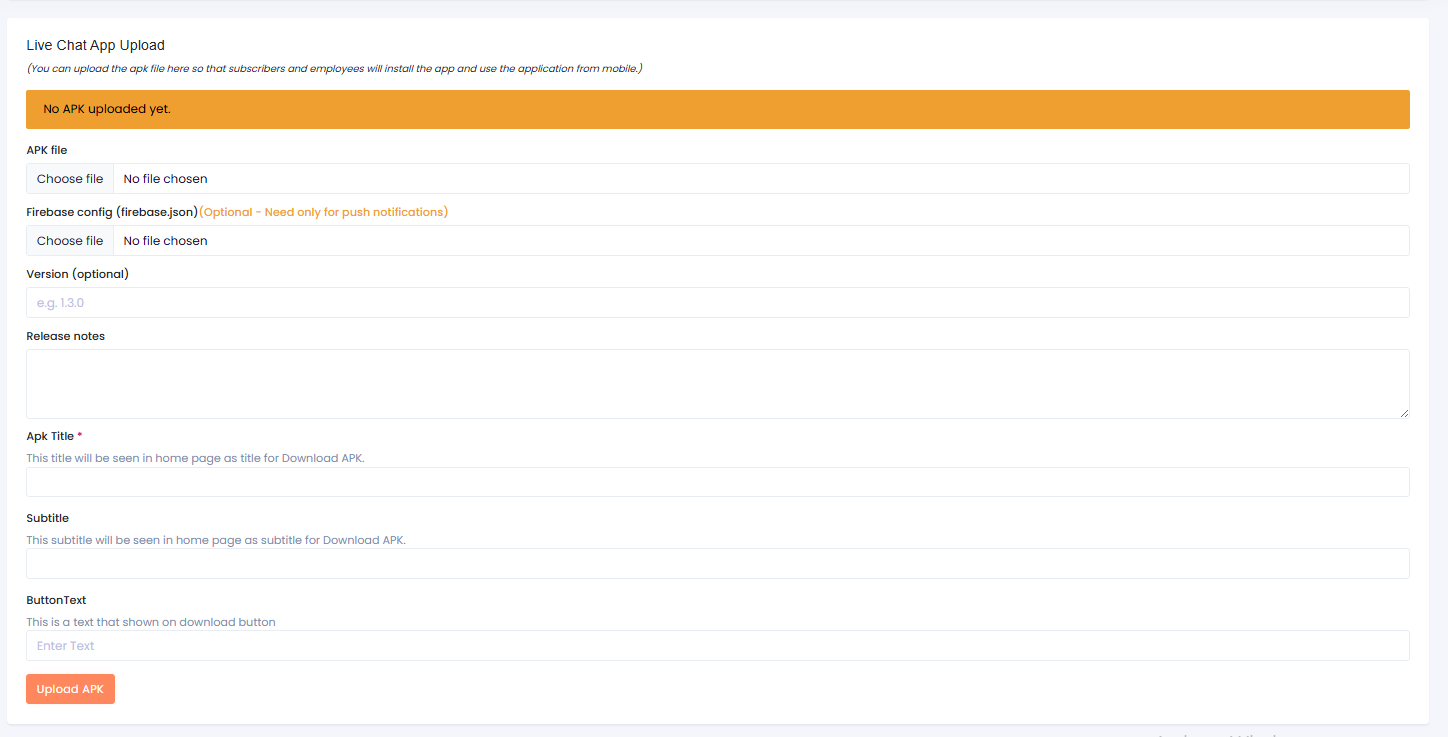
Users can then download the APK directly from the home page and log in through the app.
FAQ'S:
1. What is a Push Notification?
Overview
Push notifications are messages sent from Firebase Cloud Messaging servers to your device. They can reach you even when the app is closed or running in the background.
2. What is a Local Notification?
Overview
Local notifications are scheduled and displayed by the app while the app is open/active or at a time the app has scheduled locally.
3. Do I need a Firebase project?
Answer
Only for push notifications. If you don’t need push, skip Firebase and the app works with local notifications.
4. Do I need a Google Play account?
Answer
Only if you want to publish on the Play Store. For private or internal installs, share the APK directly.
5. Can I change the app name/icon without rebuilding?
Answer
No. The app icon, splash screen, and notification small icon are built into the APK. To change them, modify the assets and rebuild the app.
6. I changed the server URL; do I need to rebuild?
Answer
If you changed the server url, give latest url in brand.config.json and then follow the setup steps again and rebuild the project.